We’ve been working for what feels like all summer on our outdoor curb appeal project. And I am not mad about that one bit. It’s been fun to be able to enjoy the summer sunshine, the time together, and the vacations all while making a massive impact on the look and feel to the exterior of our home. If you haven’t yet read our post on just how we made the drastic transformation with paint be sure to check that out here
Our latest impact has come with lighting. It really is wild to look at before and afters when it comes to lighting. The simple change has a major impact on your space. Which is probably one of the many reasons I am obsessed with these changes. But when it comes to outdoor lighting I often notice people get stuck picking out all matching lights.
I am here to tell you that it’s ok to do it differently!
When we started our search for new lighting we knew we wanted our front porch lighting to be a show stopper chandelier. Which was where I wanted to start. But as with every project we tackle it doesn’t always happen the way. I ended up finding the garage lighting first and absolutely loved the modern style, finish and size. These lights are the Paradox in bronze by Troy Lighting.
Once we solidified the garage lighting we were able to select the next set. As I continued to search for that magical chandelier I fell in love with the Bunker Hill by Troy Lighting in vintage bronze. I was first drawn to this particular fixture because of the mounting and size. We needed a light that could be mounted over the top of our side entry, and we needed that light to be substantial in size. I felt both the Paradox and Bunker Hill lighting worked well together because both have a bronze finish and have straight lines which help making the lighting coordinate together!
Now having selected two of the three fixtures we needed really helped guide my selection for our front porch chandelier. When I came across the Morgan Chandelier by Troy Lighting it was basically love at first sight! So I thought it would be helpful for me to give you guys the guide I used to help pick exterior lighting that do not match, but rather coordinate.
Here’s some simple things to look for and think about when picking out exterior lighting for your home.
Finish – one way to help keep your exterior lighting feeling cohesive without feeling matchy matchy is by having the same finishes in some part of each lighting fixture you select.
Size – This is really important. You want to make sure the lighting size is just the right size. The last thing you want is a fixture that is just too small. We like to look at the dimension of the lighting and actually go measure it out in the space the lighting will go into.
Mount – Become familiar with how the fixtures can be mounted. Sometimes fixtures can be mounted several different ways while other fixtures can only be mounted one way.
Style – When mixing fixtures, sticking with similar styles makes it easier to ensure they will coordinate and flow well!
Here’s The Easy Way On How To Build Cedar Planter Boxes At Home
This latest addition to our backyard has to be my favorite yet. As many of you know when we got our driveway re-poured earlier this summer we ran into the problem that the pervious owners built the patio over the top of the driveway. So you guessed it…as we pulled out the blacktop the patio came with it. Michael came up with a great solution to our problem. Instead of trying to fix a patio in dismay, that we have absolutely no love for, why not build something in its place that we will love?!? Talk about a brilliant idea, no wonder why I love this man.
What I think I love most about this project is you can complete the whole thing in a weekend or even with a couple of hours over a few nights. Plus the impact it makes on your outdoor space and the clean lines are too good not to stare and admire. The cedar tongue and grove is easy to work with and can be found at most hardware or lumber stores. And having a planter prevents any soil and mulch from getting all over the place! We built our cedar planter large enough to plant hydrangeas inside them!
So let’s get down to the nitty gritty.
Supplies you will need:
Cedar tongue and grove (quantity and size depends on your layout)
Treated 4×4 or 6×6 posts
Spare 2×4 or whatever long length, strong wood you have laying around
Concrete mix
Small rocks
Galvanized Exterior nails
Nail gun (I use a Paslode)
Air compressor
Air hose
Tape measure
Compound Miter Saw
Table saw
Hammer
Shovel
Wheel barrel
Plants/flowers
Dirt and mulch
Step by step guide to make your own planter box:
First, clear the area of all plants, leaves and debris.
Measure your space to ensure you purchase enough cedar to build your box and the right amount of posts to secure that box. Note: you will want to build the box higher than the height of 1 piece of cedar (ours is 20 inches).
Mark post holes.
Begin digging each post hole. You will want to dig down at least 16 inches – you could go deeper, but this is a planter box, not a fence. I find that 16 inches is plenty deep and allows concrete to penetrate and hold.
Once each of your holes are dug, measure each of your posts right on prepare for cuts. Remember, you mark the 16 inches and THEN the height of the box itself…don’t cut yourself short!
Begin cutting posts.
Insert the first post. I like to cut small pieces of cedar to ensure I leave the perfect amount of space between the post and concrete so the full piece slides right in once posts are secure.
Insert the second post using the directions in step 7.
Once 2 posts are inserted, use your level to get everything plumb. Then take your 2×4 or spare wood and connect the 2 posts together. This step just adds support prior to adding concrete to each hole.
Repeat steps for all posts.
Once all posts are secure, triple check that they are level. Then open your bog of concrete and pour some dry mix in the hole and add water. Feel free to pre-mix concrete and water in a bucket, this is just the way I do it when working outdoors.
Allow posts to settle in. You may want to wait 24 hours…I started the next steps right away.
Remove your supporting wood pieces.
Measure your first side. I go from one side to the end of the post and cut a 45 degree cut at that mark. All of my corners are 45 degrees.
Take your nail gun (connected to air compressor, if applicable) and secure cedar to posts.
Repeat for all sides.
Repeat for the 2nd and 3rd rows (and if you add more, them too).
I added a cap/ledge across the top of the box to finish it. And it made a WORLD of difference. To do this, take your table saw and measure the depth of the tongue and groove on each side respectively. Set your mark and rip those sides off. Make sure to do this for enough pieces,
Measure your tops, cut the 45’s and secure.
Now your box is built and it is time to level out with dirt.
It’s hard to believe it’s already been a year since we last talked about this. And yes, we know to many of you that have been following along you’ve read our first post. But as we enter into a new phase of our life, with Zo heading to Kindergarten, this topic continues to become more and more relevant and real then ever before.
So let’s just get right into it. We vaccinate our kids. Yes, we vaccinate them for every disease with a vaccination that is recommended in the immunization schedule by the Advisory Committee on Immunization Practices (ACIP), a committee made up of leading medical and public health experts. In addition to the recommendations by this group of medical professionals whom study science for a living, the schedule for immunizations is also approved by the American Academy of Pediatrics and the American Academy of Family Physicians. And if that isn’t enough, it is recommended by our personal pediatrician.
So why talk about this now, again after we already did last year? Well, first because this is a hot topic and one that has the possibility to effect the most precious beings in our lives. With both boys starting new schooling in the fall we are finding the facts hard to believe. For instance, did you know that in the state of Michigan only 56% of toddlers are up to date on their recommended vaccinations? Or the fact that in the state of Michigan parents who send their kids to school can opt out of vaccinations all together, therefore putting everyone in the school at an even higher risk? That doesn’t sit well with us at al whatsoever.
If you’re wondering where we are getting our facts from, don’t sweat it. We’re open and honest people over here. We use I Vaccinate which provides information & tools based on real medical science and research to help Michigan parents protect their kids. Yes, you guys REAL MEDICAL SCIENCE RESEARCH. We feel putting that in capital letters may get our point across. Because in this household real medical science research is what we base our medical decisions on. Not cultural fads rooted in baseless, mythical beliefs.
MICHAEL
Hey guys! If you’ve made it to this point you clearly know how adamant we are about vaccinations. Both Danielle and myself have been vaccinated our entire lives and we’re not for one second even considering pressing the brakes on it for our kids. Choosing not to vaccinate your children puts their health at risk, as well as everyone around them. We want our boys to live healthy, long lives. We work hard every minute of every day to give them the best that life has to offer and will stop at nothing to ensure they’re happy and healthy. Anything we can do to prevent those little dudes from getting sick, or getting anyone else sick, we will do. And most importantly for us is keeping them up to date on vaccinations.
Sure, there are “data points” out there as to why vaccinations are harmful. Albeit not scientifically or professionally verified by any respected and notable medical journals, but they’re out there. And we can’t hide from them. We need to talk about them. And when you lay facts and fads on the table, anyone can identify what is true or false. I like to use this example to explain where we stand…
There is strong belief by some that the world is flat…but guess what, it’s not.
Much Love –
Danielle and Michael
We’ve partnered with I Vaccinate to share my story and this content is sponsored by I Vaccinate
We are so excited to FINALLY share a curb appeal update with you! So let’s start with the obvious…paint. This has been our biggest transformation yet and was done simply with a sprayer and some incredible exterior paint. We have primed and painted the brick and vinyl siding so far. Next up with be a fresh coat of satin black to 3 of our fiber glass exterior doors and our metal garage door. So let’s get down to how you can make this magic happen too. It really is all about the equipment and type of paint.
What you need to paint brick and vinyl siding:
Primer
Exterior Paint
Paint Spray Gun
Painters Tape
Paint Brush
Plastic Window Cover
Ladders
How To Paint Brick and Vinyl Siding
MICHAEL
The first thing that needs to be done when preparing for an exterior paint project is proper research. Make sure you are purchasing the right paint products and materials for your home. NEVER assume because it says “exterior” that it will work on your project surface. Trust us…we’ve learned a thing or two from experience over the years!
Next, you must ensure your properly prepare your surface. A week prior to paint day we power washed our entire home to remove any dirt, residue build up, cobwebs, dust and any debit left behind from the seasons. The evening prior to paint we taped off all of the windows and doors (expect one left for the next day), removed our mailbox, doorbell, lights and cameras, and did a final sweep of the brick. A few hours later we were ready for a good night sleep before the big day!
As with all of our home we worked with Sherwin Williams and their vast array of paint products to pull our look together. For the brick, we started with Sherwin Williams Cement and Masonry primer, as our brick is extremely porous and would soak up paint the minute it touched the surface. Plus, when you use a primer it serves as a great base protecting and sealer. And when sprayed correctly, you only need one coat of paint. We debated a second coat, but thought it would be too thick and take away from the character of the natural brick and home design overall.
For the base paint we chose Sherwin Williams Greek Villa exterior, which is a true bright white (even though it appears a bit more creamy). It covered extremely well over the primer, as well as our vinyl siding which was a beige. Please note that when painting over a darker color siding you may need more than one coat of paint…we were fortunate with this one! All in all, with primer included, we blew through 14 gallons of paint without breaking a sweat. Ok, I’m lying, there was a lot of sweat involved.
The next major thing we’ve tackled is the massive hole we created when we did our master bathroom project in the spring. As sad as I was to take out a window, this hexagonal window really had no business being in our bathroom or anywhere in our house. It’s just not a style that reflected us. Our quick fix for the window was to box it in with a large piece of wood screwed to the siding until it was time to tackle the exterior.
MICHAEL
Another big change to the exterior of our home was the addition of cedar tongue and groove siding. But instead of goin all in with cedar and brick, we decided to add accent areas to pull in the natural look. For us that meant our front bay window and peak, porch peak and underside, garage peak and finally our master bedroom dormer which was the only section previously wrapped in vinyl siding. I removed a portion of the siding from that dormer and repurposed it on the side of the house to close in the where the window was. That was, of course, after I removed the temporary solution of wood and installed insulation to protect the interior. Once the vinyl was installed I applied a coat of pain and viola – you’d never know a window ever existed in that space. It may seem tough, but with the proper tools and planning anything is possible.
Thanks for stopping by to see what exactly is going on with our newest project. We cannot wait to share more with you over the next few weeks including exterior lighting, tech, more cedar projects and our front porch! We promise to give you full step by step DIY instructions to do these rad outdoor projects to your home too.
As we approach the fourth I find myself looking to add a little patriotic red, white & blue to our home decor. Simple, classic and easy finds. Here’s a quick list we like to use when decorating for the holidays.
5 Simple Home Decor Tips
Decorative throw pillows– I can never have enough pillows in my life. I purchase pillows of various sizes to both keep the options open, and keep cost down. It’s a way for me to repurpose the inserts for different holidays/seasons. Buying a pillow cover is a major savings.
Target dollar section– Yes I find all kinds of things I don’t need there but it’s also a great way to pick up inexpensive decorations to add that special decorative touch you are looking for. Gotta love this section.
Flowers– Fresh flowers are always a good idea. We love picking them up to give that pop of color. They also work for the neutral vibe you can rest your eyes on in a room. That’s how we used them this holiday.
Clothing– I know this one might seem weird. But I love going to my closet to try and utilize what I’ve got within my decorations for the season. This holiday I used a scarf to set the table as my table runner and one of Michael’s jackets to give that pop of red I wanted in our office/mudroom space.
Napkins– Whether it’s beverage napkins or cloth napkins they’re the perfect touch of special every holiday needs.
It’s time for us to talk about our next major project! This one we are pretty stoked to share with ya’ll. We are going to do a complete exterior makeover! As always the line up for this project isn’t small. We’ve come accustomed to the the go big or go home mentality over here. Throughout this post you’ll see some inspiration images from our Outdoor Space Pinterest board, but for more you should check it out here!
For this one, Michael is going to break it all down.
MICHAEL
Front Porch
With our recent new driveway and walkway addition, we had to rip out our stairs and rebuild them. More to come on that, but the porch overall will see some significant changes. New stairs, posts, accents and stain will bring this functional porch to a show stopper.
Paint
We despise the color of our brick. Like, truly, it sometimes makes us want to puke. But of course we don’t puke ?. There is just nothing classic about it. So we’re going to change that with a fresh coat of primer and 2 – 3 coats of paint. You’ll just have to stay tuned for the color choice!
Siding
Similar to the brick… ?. Most of our siding will be painted but each peak, dormer and our large front window will be updated with some tongue and groove cedar siding. This includes some of the garage. This will add some depth and compliment the natural elements we have sprinkled in around the property.
Doors
We’ll be updating our doors a bit. Fresh paint, hardware and potentially a door swap here and there. Can’t wait to add some life to these! Just think lots of light!
Lighting and Electrical
Our current lighting is limited and drab, and we have one outlet in the most random spot outside. So we have ALL NEW lighting going in around the house and garage and all new electrical to power them, as well as our new doorbell and outdoor surveillance. The gadgets are fun, but honestly the new lighting we have is AMAZING!!!
Landscape
Since we moved in 3 years ago we’ve done a TON of landscaping. And when we say “we”, we mean Chuck (otherwise known as Dad, or Papa by our boys). He is an absolute magician when it comes to landscaping and without him we would be lost. He takes our vision and makes it a reality, always adding his spin to the design. This year we’re adding some custom ground level flower boxes. All in cedar, of course! These little sprinkles of natural wood will give the depth we’re looking for. And fresh mulch all around…who doesn’t love that?
Window Boxes
We’re already adding some ground level boxes so why not build a few window mounted boxes as well? But honestly, we have some already…they’re just not cedar. And we’re not happy with them so it is time to build them again.
Playscape
We started with the playscape re-build last Summer, and then we almost moved so we put that project on hold. Now that we are staying it is time to add some customization to this awesome space for our dudes. It will be a reflection of our new exterior…and will be friggin awesome! We can not wait.
We hope you can envision what we’re about to do. It is going to be an insanely busy Summer and Fall but we can not wait to really dig in and rock this project out!
This past weekend we had the opportunity to take some much needed time off from our house projects and jump into the truck for a road trip up to Blue Mountain Resort. What a 48 hour getaway it was! We absolutely loved the down time we got as a family, not to mention the abundance of activities for the boys and all of the food! I thought it would be fun to break down how we spent our time together so you could do it too during the spring at Blue Mountain Resort. And let me tell you, their summer and fall activities look just as rad too!
Where To Stay at Blue Mountain
We stayed at the Westin Trillium House and I could not recommend this place enough! They went out of their way to make our crew feel right at home. From the teepee and bowling set inside of our room for the boys to play with to the perfect suite for a family of four including a full kitchen, balcony and a fireplace! We loved the amenities the property had to offer. They have a children’s play room on the main level and the boys just had to swing in for a few minutes anytime we were leaving or entering the hotel. The pool area and gym was perfect. And let’s talk about food! Yes, we tried that too and it was on point. We’re all suckers for room service. There’s just something about it coming right to us in the room that we all seem to love when traveling!
This was a HUGE hit for our crew. Although Enzo did give us some resistance with the how high it went and being worried it would be scary. But Michael and I decided it was worth pushing him to overcome his fear! We’re sure glad we did. The 360 views with the wind in our hair was SO worth it. It took Enzo less than 2 minutes to love the ride too! Not to mention the perfect photo opportunities at the top of the mountain. There are also some trails on top that you can do a short hike with your crew. We brought the double stroller up the mountain which made everyones life easier.
This place is perfect for kids of all ages. But all that mattered to our little dudes were the water slides (that didn’t go too fast or too high)! Added bonus was Enzo could stand in most of the pool. He loved that it provided him the opportunity to swim or stand wherever he wanted to in the pool. Mr. independent, huh? Ziggy loved practicing all his swim skills and basically holding his breath as long as he possibly could!
Kids and adults alike will love this 18 hole course. Our crew made it a whole 6 holes, so we for sure count that as a win! One tip we can provide is the course is in full sun. So wear that sunscreen or come later in the evening when the sun is less intense.
The boys love being out on the water and were making the boat move all by themselves…well you know kinda with Michael’s help! We went in a boat for 4 which was a little tight seeing how I didn’t trust both boys to sit in back by themselves. I would advise getting two boats, unless you’ve got little ones you can trust in back all alone!
Get your workout on while enjoying the view. With this hike you can clearly see why people workout on inclines! We’d love to come back to do this hike later in the summer and the fall too, there are just so many things to take in!
This looked so rad but as you know Enzo just wasn’t up for it! Maybe next visit we will give it a try…or Ziggy will be tall enough to ride, and he’s pretty fearless!
This place was the perfect start for our crew! Pizza, meatballs, garlic bread and Cesar salad with a bottle of vino for Michael and I! The boys loved that we could sit outside and see the playground and pond at the same time! The pizza was perfect for sharing and they offer so many different choices. We went with pepperoni for the dudes and Johnny Lombardi for us!
Breakfast served all day, I mean you can’t really go wrong here! Our dudes loved the pancakes and waffles. Michael and I shared lox and yogurt with fruit with a side of scrambled eggs! We both felt the yogurt could have had less fruit and more yogurt but loved the taste regardless. The lox were on point and the eggs were done exactly how Michael loves them. We added some hot sauce to kick them up to the next level!
This restaurant was hands down our favorite of the weekend! If you’re looking for a romantic night out or even a family night where you get to enjoy delicious food together this spot is it! The boys went with butter garlic noodles, a go-to favorite of theirs of course! Michael and I got a full spread including the antipasto, seared scallops and Caesar salad to start! We shared two entrees which were done to perfection! And ended the evening with dessert. What’s not to love about that!
We loved this spot! We dined here for breakfast and Michael and I no joke talked about it all the way home. The boys got waffles…of course. We went with the eggs Benedict which was to die for and the yogurt which Michael loved so much we took one home with us! Gotta love a good freezer bag for travels!
We loved this quick getaway for our crew and truly look forward to visiting again! You know every place leads to new adventures and fun memories that we will hold on to for a lifetime. Till next time!
It’s really hard to believe that in just 5 weeks we took our master bathroom down to studs and transformed it to look like this. If you haven’t had the chance to see our whole process make sure to check out some super rad before and after shots here. Today I want to focus on the details that bring our bathroom to life. In particular, our faucets and accessories.
To be honest with you I haven’t payed enough attention to these elements in a room prior to doing this renovation. Now I can’t help myself, I am no joke checking out faucets EVERYWHERE we go. There really is just something about a faucet that pulls the whole room together. These tiny details help complete the space, delivering a look and feel that reflects you. So let’s chat about what we choose and why. Because you guys there are literally millions of options out there and finding the perfect one for your space is not only satisfying but rewarding, seeing how you get to use it daily. I’ve put together a short list to help you narrow down your selection process for faucets and fixtures and make it a less daunting task.
How To Choose The Right Bathroom Faucet
Pick a finish:Knowing what color you want narrows down your choices from the start. Not every product is carried in every finish. Right now I feel that Champagne Bronze, Polished Nickel and Venetian Bronze have been on my radar for finishes I am loving.
Decide on the style of your Faucets: Wall mount, vanity mount, centerset or widespread. A Centerset Faucetcomes with a combined spout and valves on a single base unit. The centerset can have either a single handle mixing lever or two handles mounted on plate. A Widespread Faucet comes with a separate spout, hot and cold water handles.
Product features:This can really narrow down what you are looking for. Every faucet offers different features making that faucet unique. To give you a few ideas of what we like in features I’ve got another short list for you. Do you want built in technology, water saving technology, touch based or spot resistant (keeps it cleaner longer). So many things to think about, right?
In our bathroom we were looking for a modern finish and style making our decision to go with the Dryden Collection by Delta Faucet an easy one to make. We knew we wanted widespread faucets, which narrowed down our selection even more and we also knew the champagne bronze was calling our name. These two handle widespread bathroom Dryden faucets are absolutely stunning. It took Michael a little extra time to get the placement just right, as we used a 2.25 inch thick piece of maple from the 1950s as our countertop. All customization comes at a price, and for this one, the price was time!
MICHAEL
When it came time to work in the new shower, I avoided it as much as I could. There’s just something slightly uncomfortable about updating all of your plumbing and lines deep in a wall that will soon be covered with cement board and beautiful tile. What if it leaks? What if the shark bites aren’t tight enough? What if, what if, what if. You just have to fight through it and have faith that what you’re doing is correct and will work. I started by installing a new universal shower rough, which gives me piece of mind every day knowing we have all new internal guts to the shower. And there was no need to sweat any pipes as shark bites are available to connect everything together. I HIGHLY RECOMMEND you consult a plumber if you’re not familiar or comfortable with this type of work.
But what really got me through it was knowing about the new shower trim kit that was going to be installed. It is sleek, modern and has a temperature control that is essential for us and our boys (they get a kick out of telling us hotter or colder). And this champagne bronze finish of this Dryden Monitor® 17 Series H2Okinetic® Shower Trim against our tile is absolutely spectacular!
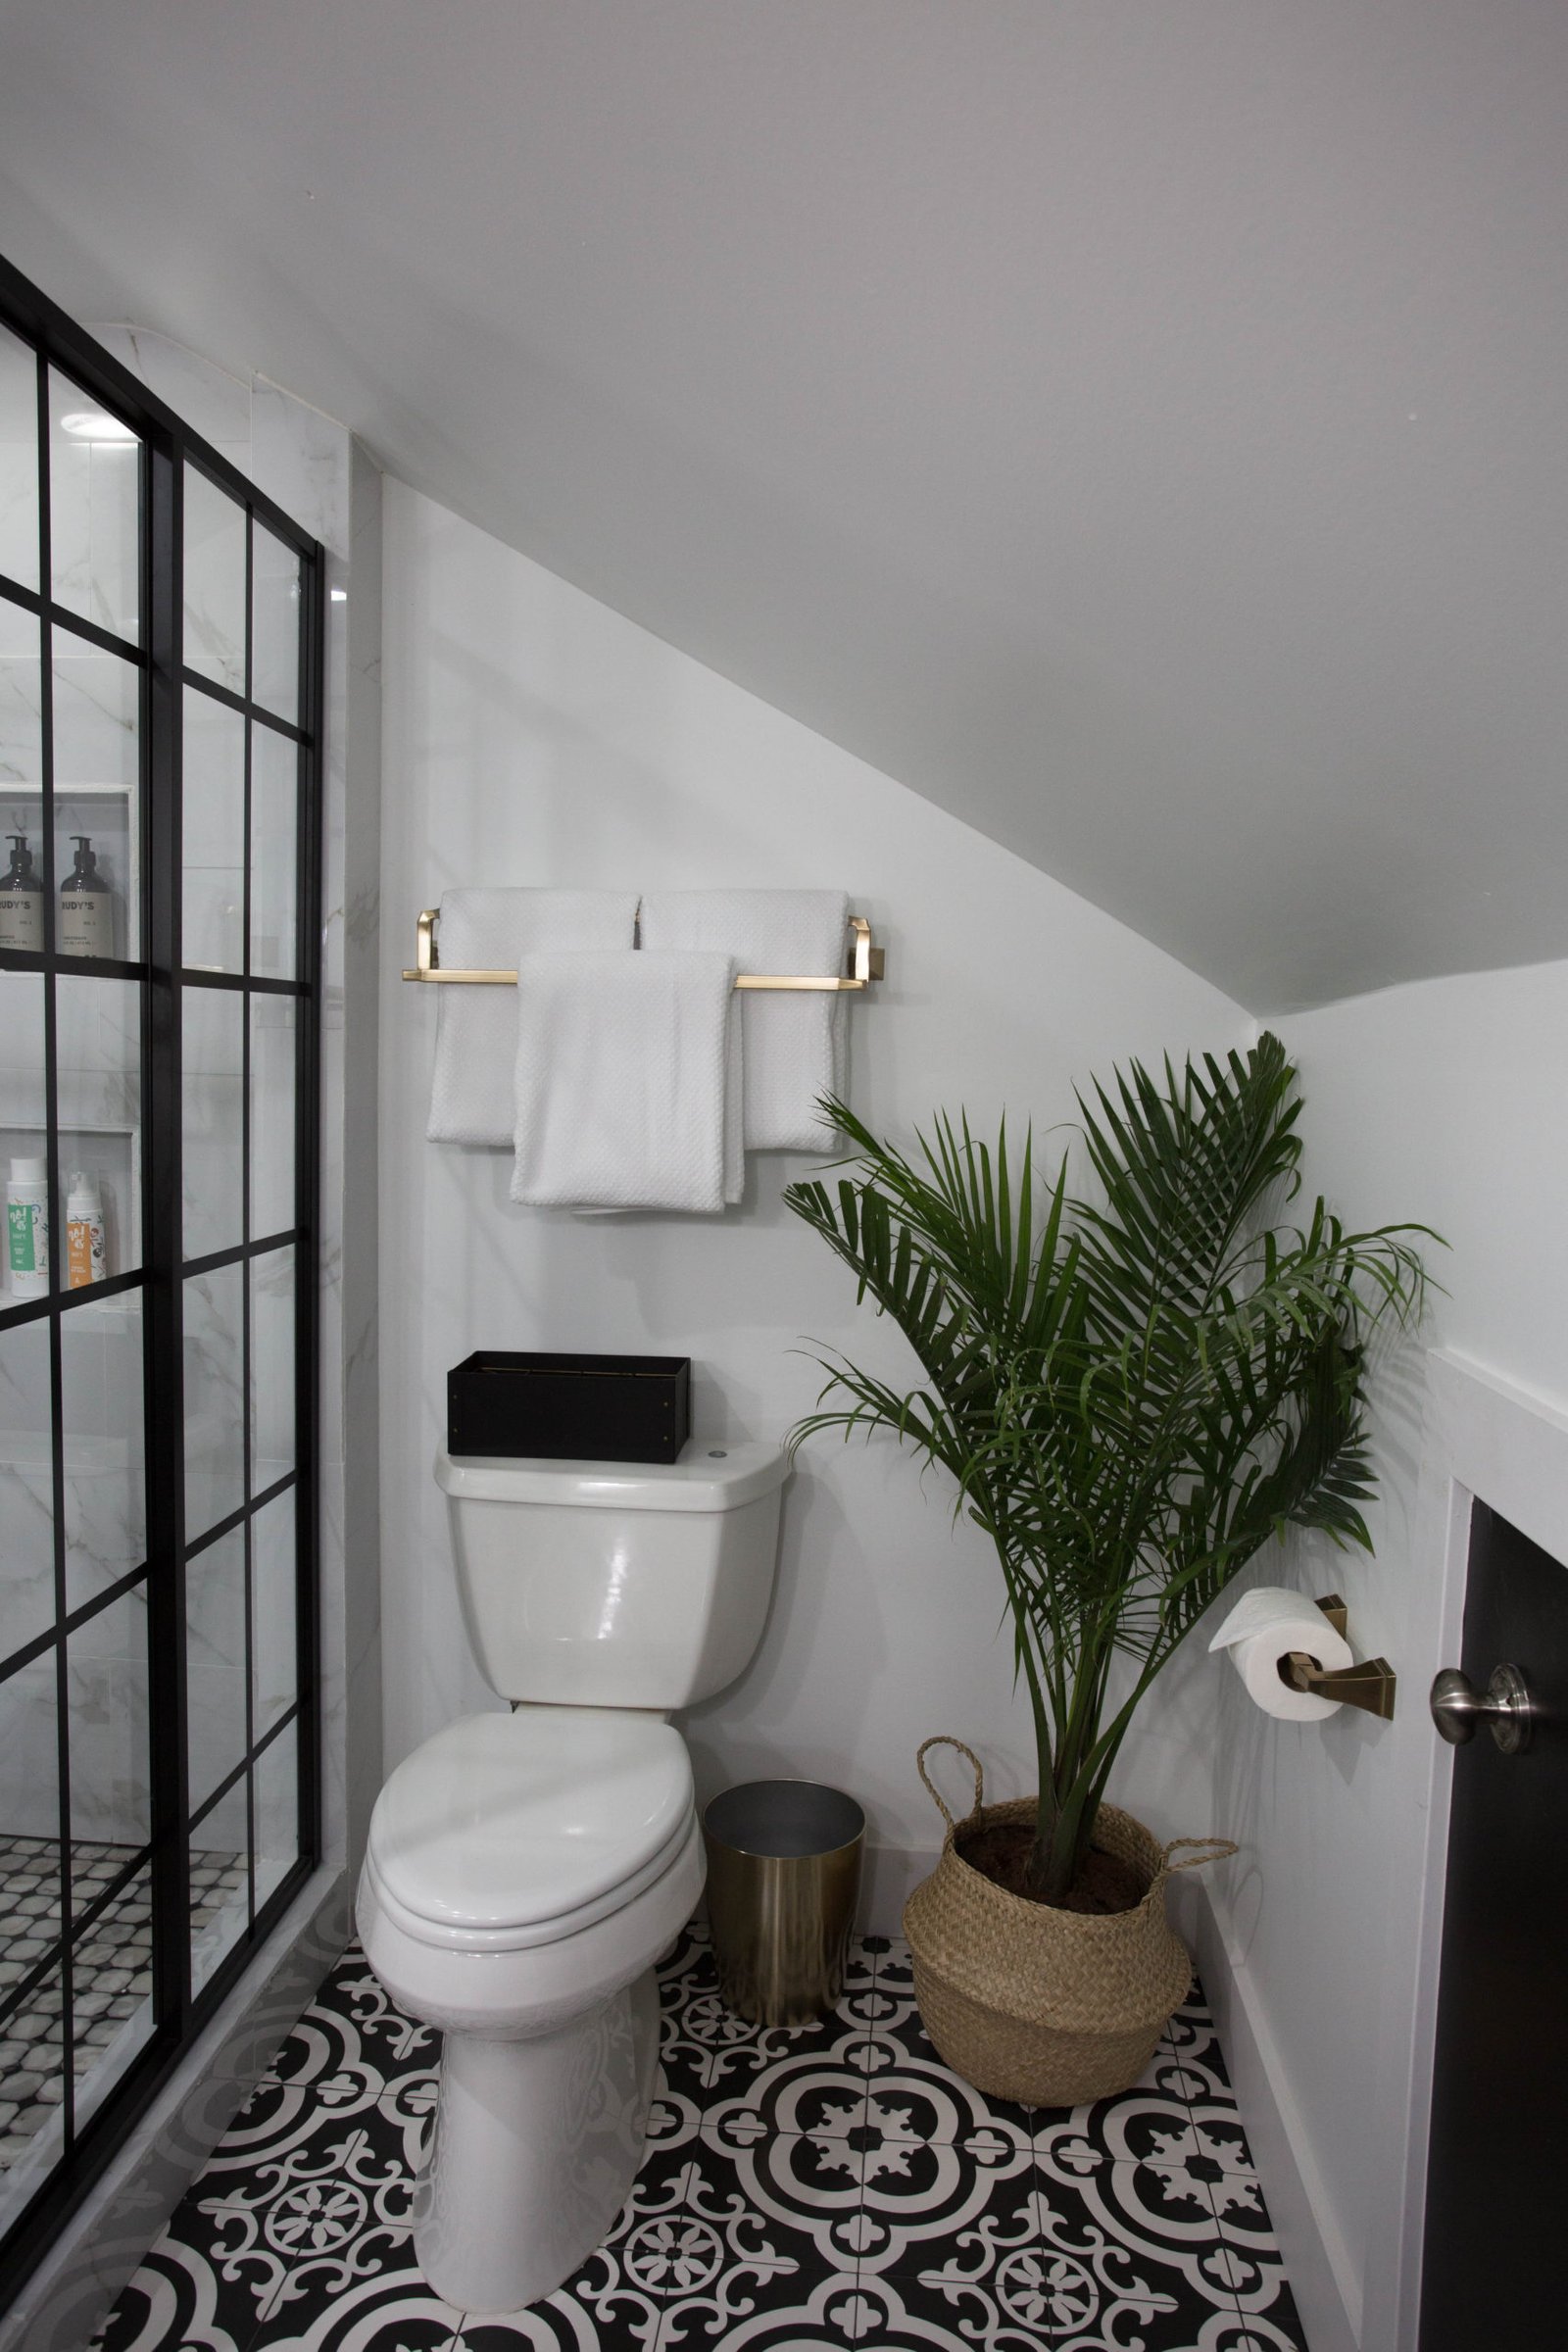
When it came to accessories in the bathroom this part was easy since we knew we wanted a cohesive look. Everything we selected was in the Dryden Collection, and we couldn’t be happier with the final product. The dual towel bar is an absolute must in any bathroom that a family utilizes every day. And a secret for all of you – this is the first time we’ve had a toilet paper holder in this bathroom! Previously we just placed rolls in a basket…so we’re like, real cool adults now!
Enjoy!
Danielle and Michael
We’d like to thank Delta Faucet for sponsoring this project, and more coming later this year at Clark + Aldine.
I can’t even believe we’ve made it…week six of our One Room Challenge and the master bathroom is complete. We’ve taken our space from a quick fix update to a full, down to the studs, all-new everything renovation. And we made it all happen in less than six weeks. It really is wild what you can get done when you set a deadline, make a commitment and put in a lot of hard work. If you’re new here and haven’t had a chance to see how we went from start to finish make sure to check it out!
Now the fun part and my absolutely favorite part of any project – the before and afters. This bathroom started jammed packed with lack of character, personality and really not much function for a family of four to use. Plus, we knew there were some serious issues behind our shower and it was time to take care of it. Let us walk you though the entire process of the makeover and how we transformed this space into a modern chic space for us to love and use daily.
Before
For us the bathroom remodel all started out with function. How could we create a more useable space with the limitations we were dealing with and the angled ceilings that made everything that much more challenging? The only option we had was to gut the entire space and start from scratch. The major changes we made to address the function were changing the shape of the shower from hexagonal to square, adding a second sink and removing the ugly window in order to fit that second sink! But in order to pull it all together we also had to build a new vanity, change the plumbing and add all new electrical throughout the space.
Once we landed on the new layout, design was the obvious next step. For this space tiling, lighting, vanity, mirrors, paint, faucet fixtures, shower doors and bathroom accessories were all the key aspects to consider in our design. For tile we knew we wanted a bold patterned flooring to draw your attention to the length of the room and keep your eyes away from the angled ceiling. This tile made my heart so happy! I love the two different patterns the flooring makes when put together. It also works perfect for heated flooring which was a must for the pure luxury factor for us! Inside the shower we went with a Porcelain Carrara for the wall. I wanted to have a classic look with an elegant feel. We spent hours upon hours lining up the veining in the tile, which really makes me happy and creates a uniformed setting! We used the same tile inside the niches to create a finished look. On the shower floor we did a mosaic tile that is an octagon polished marble. I love the contrast from the floor to the walls. We used a charcoal grout to make the floor tile stand out even more.
Knowing we were designing in a space that now lacked in any natural light, having adequate lighting was an absolute must. We added two recessed lights and 3 new wall sconces. When planning for our sconce measurement was key. We had to make sure that we had enough space on the wall with the angled ceiling and enough room for two oval mirrors, along with the new dual sink vanity. We fell in love with these sconces from Schoolhouse Electric. What worked out even better for us was we got to pick the shade we wanted, and since we lacked in space we picked out clear shades that blended in, yet made a statement. These shades worked perfect and provided lots of love to our vanity area.
Our vanity was custom made for our space by our incredibly talented and overall amazing friends at 28th & Chairs, a local furniture and home store in Plymouth, Michigan. Rob worked with us every step of the process and was meticulous in the creation of this vanity. If you want to learn more about how we made this happen make sure to read this post all about creating your own vanity. Having the right color for our vanity was really important since this is our only pop of color in the entire room. We landed with Salty Dog by Sherwin Williams. This shade of navy was a perfect match with our lighting. We wanted our hardware to really bring out the vanity. Schoolhouse’s Vista Crystal Knobs and natural brass Greenwood Pulls accompany our doors and drawers. I couldn’t be happier with this combination.
And next, it is all about the countertop. Our initial plan was to build a custom concrete countertop, but due to some renovation setbacks, unexpected life occurrences and travel we ran into an issue with timing. When Michael visited Rob’s workshop late one night to check out the vanity they talked about the progress and timeline and together decided that a concrete countertop was simply not going to happen. So Rob suggested this magnificent 2.25 inch thick slab of maple from the 1950s that just happened to be sitting in a corner, not yet used. To make it even cooler, the wood was salvaged from the wood shop a local middle school in our area! Michael accepted the suggestion and offer and brought it home to customize.
Having all our faucets, shower fixtures and accessories match was key for us. We partnered with Delta Faucet to make all our dreams come true. The Dryden Bathroom Collection was everything we wanted for this space, and then some. I love the champagne bronze finish of these fixtures and accessories. For our faucets we went with the two handle widespread Lavatory Faucet in champagne Bronze while in the shower we have Temperature 17T Series Shower Trim. We’ve got the 24 inch double towel bar also in champagne bronze. And we even got a toilet paper holder, which is big for us because we haven’t had one in this house since we moved in almost 3 years ago. Here’s what we got.
Finding mirrors for this space was a real challenge. We only had 28 inches high and 18 inches wide to work with, which created quite the research project for us. We opted for an oval shape to maximize the mirror space for what we were allotted. When I found these natural wood oval mirrors I was in LOVE ?.
I knew exactly what I wanted for shower doors. It was just a matter of finding a black French door look. When we found these doors it was a HUGE win for us! The last thing we added was our palm plant with planter from Ikea and the plant and planter on the countertop from 28th & Chairs.
And finally, we’d like to thank our very awesome sponsors for helping us make this vision a reality.
We hope you enjoy this space as much as we do! It was a very long, very jam packed renovation project but we embraced every moment. Please let us know if there is anything you want to learn more about with our process as we are more than happy to share! Until next time…enjoy!
The past few weeks have been beyond wild in our house. From completely gutting our master bathroom, to customizing every inch of it, oh and having two little dudes wondering around wanting to see and get into everything we’ve got going on. Good thing Michael is a great teacher because this renovation is really testing our limits and skillset. So time away from our bathroom project has become essential time for us to relax, and setting the mood for it has become a number one priority.
Our bedroom has become our retreat destination after the kids are asleep and our work time is over. To help with create the perfect vibe for the space, we got the Element Classic A19 LED Lighting Starter Kit. There are so many aspects I am obsessed with about these lights I’m no joke sitting here giddy to tell you about them ?
I know, this might seem totally weird to some of you for me to be this passionate to write about light bulbs. Light bulbs are light bulbs, right?!? Well you can totally look at it that way. But I am here to tell you there is seriously so much more to light bulbs than that. I am a true believer that a bulbs color temperature can change your space, and your mentality. For me it can make me love the space that much more.
Michael and I both have our favorite features with the Sengled Elements, but one that tops both our lists is the ability to pair with our other smart home products. We can say “Hey, Google – or – Alexa, turn on (off) bedroom lights.” Or “Alexa, dim (brighten) bedroom lights.” It is super rad! And the boys love it too. We both read at night, and being able to turn lights off before going to bed via voice command is awesome, especially since our lamps are just out of reach! We’ve even added two more downstairs so we can turn lights off after we leave the house or have our lights go back on before we walk inside. And since we often travel, we’re able to schedule when the lights are on or off!
Michael is going to hop in here and tell you about everything tech related that he loves about our lighting! Because you know if there is a smart option out there we’ve got to have it. Anything and everything to make life just a little bit easier.
M: Well, we pretty much covered the basics. But there are some tech steps involved in getting your Sengled Element kit connected with your wifi and smart home ecosystem. I won’t go into a long boring script on how to connect it, but rest assured it is very quick, easy and the the directions included in the kit are seamless. And don’t worry, if you do not have a smart home voice enabled device you can simply download the Sengled Element Home app and run everything from there. But fair warning…it can get addicting!
As many of you who have been with us for a while now know, we are both passionate about our Earth and doing things to help our planet thrive. That’s one of the many reasons we are loving the Sengled Element Kit…they are eco-friendly!